Your trash on your Mac takes up your storage. You should regularly empty out your trash. You can find your trash at the bottom right hand of your screen. Once you double-click it the image shown above will come up. Just press the empty button and it goes away along with the storage that it is taking up.
The second location that you should clear out regularly to free up storage is your downloads. Downloads can be found on the top right of your screen where the down arrow button is located. Once you click it you can clear out the downloads.
Unfortunately, your downloads are stored in two locations so you will also have to open your files and select the download button. You can find your files in a few locations. The easiest is to press the button on the bottom left corner of your screen. It has a face on it and is called the Finder button. The screen above will pop up. Select the downloads button. If you have a ton of downloads you can click once on one file to highlight it in gray, then push your command button and the letter "a" at the same time. This will select all of the downloads. Once they are highlighted in blue you can drag them down to your trash. Make sure to empty the trash once you drag them down.
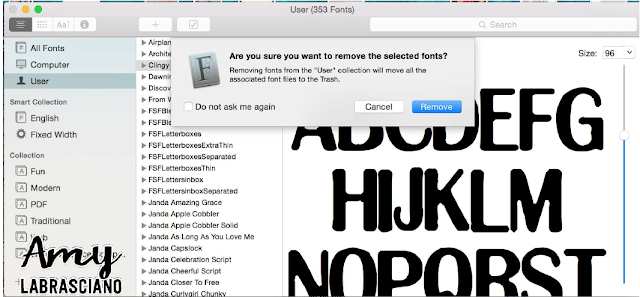
Are you a font lover? Did you purchase extra fonts to put on your computer? They can take a lot of space up on your Mac. If you select your Applications button in Finder you can scroll to your font book. This allows you to see your fonts. You might be surprised to see that you have downloaded some fonts twice.

Highlight the fonts that you don't want anymore and press delete. This will allow you to remove your unwanted fonts. I wouldn't recommend removing stock fonts from the Mac.
Are you exhausted from finding all of the hidden storage hogs on your computer yet? If so, you aren't alone. I've been working on this for over a week and I'm still not done. The next place to look is your iTunes account. When you click on iTunes select Preferences.
Under your device preferences you will see all of your phone, iPad, device, etc. backups. You only need to keep the last back up for each device. Delete the others.
Once you go through these locations you are going to need some extra help finding hidden documents. If you select Finder you can type in files that may be hidden. For instance, I typed in .png and .jpg to find where all of the hidden photos were. I also typed in .mov to find the hidden movies. Once you find these documents you can delete them.


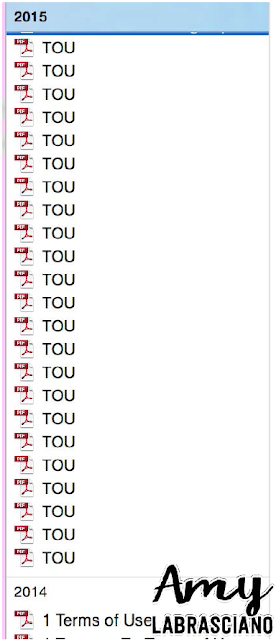
If you buy files like clipart with "Terms of Use" attached, try searching: "TOU", "terms of use" and other variations in finder. You will find a ton of files taking up space. Do you really need the same file saved 50+ times?
I have not been able to find any other ways locate hidden files. If you search on the web there are programs that you can buy to help find hidden files. Once I have purchased one and tried it out, I will update this post with the new information. If you try one out, please comment below and let me know what happened.
The following tips are ones that I wished I learned before I saved one file to my computer.
You can purchase an SD card for under $100 that will more than double your storage capacity. I purchased one and transferred all of my clipart to the card. My ultimate goal is to store nothing on my computer, but it will take some time to finish cleaning it up.
I also signed up for a paid Dropbox account. I store all of my files that are complete on Dropbox. Dropbox is set up to automatically download photos from my phone. This frees up storage on my phone. The reason that I use Dropbox is because I can share files with friends, colleagues and clients from my phone wherever I am. I can also store all of my files without worrying about losing them in a house fire or natural disaster. My files are also backed up on a harddrive.
This PDF went from 12.3 MB to 7.8 MB. This storage adds up over time, especially with larger files.
Below you will find an app that I bought from the App Store. This app is wonderful for finding duplicate and hidden files on your computer. It freed up half of my disk space.
 |
| Add caption |
If you have any suggestions for freeing up storage or saving properly to begin with, please leave them in the comment section below.


Thanks for all of your storage tips and tricks!! :)
ReplyDeleteGreat tips! Thanks!
ReplyDeleteThanks for stopping by!
DeleteThis comment has been removed by a blog administrator.
ReplyDelete