Learning Lessons with Mrs. Labrasciano Home Shop Instagram Pinterest Email Image Map

Teacher's Pets - Teaching with Cats and Dogs with Mrs. Labrasciano


I'm so glad that you stopped by for our linky! Today we are going to share my family's pet adoption stories with you along with the lessons that my children have learned.  We promise to be brief! I then want to share some lesson ideas on cats and dogs that my student's went CRAZY for.  They thought it was the coolest.  If you stick it out to the end, we have some great prizes for you to win.


This cute furry face is Hurley.  My girls and I adopted him from a local county shelter while we were dropping off supplies that we had collected for the shelter.  One of the volunteers called us over and told us that Hurley only had 2 hours before he was euthanized. He was so close to expiration that the shelter had deeply discounted him.  Can you imagine? Discounting a living thing. As if the $50 we save would make a difference over his lifetime.  So of course we caved and brought Hurley and all of his quirks home with us.  The best the vet and trainer can tell, Hurley is part Terrier and part Basenji. You may know that Basenji are barkless dogs.  Hurley is a very quiet dog.  He does occasionally alert us when strangers are at the door.  Not always though.  He makes the cutest sounds that are different for a dog, but common to the Basenji.


Hurley was 2 years-ish when we got him. He's now 4 years-ish.  Hurley is fiercely loyal and won't leave my side unless it's to be with this cutie pie.  He's also deathly afraid of water and won't do his duty in our yard.  He has to be walked.  YES it's a pain in the behind.  My girls have learned responsibility, love and compassion from Hurley.  They have learned to love something despite his differences, oddities and sometimes grumpiness.


These girls are Elsie and Luci.  Luci the grey cat was adopted as a stray kitten from my church.  We rescued her from the mobs of children at VBS.  Elsie the orange/white cat was adopted as a stray as well.  When we got Elsie, we were told that she was severely malnourished as a newborn.  We now know that because she was malnourished, she will never grow large and of course she is different like Hurley.  She's very skittish, crazy and  will only let you pet her under her terms.  Both of these cats have chosen my oldest as their keeper.  They sleep only with her.  It's a great feeling when you get to see your child's bond with an animal.


Along with the good comes the bad as well.  Luci recently ate a hair tie.  This caused severe dehydration and a surgery to retrieve the hair tie that had unraveled in her entire system.  The surgery was VERY expensive.  Thanks to the kindness of donors, part of the expenses were covered.  The other part of the bill will take some (a lot of) time to pay off.  Once again, the animals have taught my children a valuable lesson.  Saving and sacrifice to give to something that you love.  This has been a hard one.


Have you read "The First Dog" by Jan Brett? If you haven't, you must go out and get it from your library or bookstore ASAP.  It is a quick read that captivates students.  It is set in paleolithic times.  It has beasts to delight every child.  The book tells a tale about a dog that wouldn't leave a little boy alone.  Through their journey, the dog teaches the boy his value by saving him from a Sabertooth.  Eventually the dog becomes the first pet and receives the first dog tag.  So cute!!!!  The students had a great time finding important details from the text.  They made a dog craft with their writing in it.


Well we shouldn't leave out the felines so I want to share this book, "Comet's Nine Lives" with you.  Another great folk tale by Jan Brett.  This book details what a cat's nine lives may look like.  A brief warning, the cat dies eight times in the story.  Of course it is written in a very child friendly way and the cat lives happily ever after at the end of the book.  I explained to my students that it's a fictional book and the cat is happy as a clam at the end.  So no harm or foul.

Both of the above books are quick reads.  They could each be read in one shared reading lesson.  They are appropriate for K-3.  It would be so much fun to have a Cat and Dog Week in class.  You could add in informational cat and dog books. At the end of the week the students could compare cats and dogs.  How much fun would it be to have them write an opinion piece during writing?  Which makes a better pet - cats or dogs?    If you would like more lesson ideas and materials you can click on the pictures.  These materials are part of my Jan Brett unit on TPT.

a Rafflecopter giveaway

St. Patrick's Day Ideas with Pawsitively Teaching


Are you looking for some great St. Patty's Day ideas? If so, head on over to Positively Teaching to see what she put together for you.  She never disappoints!!!

Color Walk Fundraiser


Hi everyone! I'm here today to tell you about easy fundraising for your school.  When our school district upgraded our operating system we found ourselves with less than one computer per classroom.  Our computers that had been handed down from a local high school were too old to work on the new system.  This is a huge problem! A group of teachers met over the summer to brainstorm different ways to earn money for new computers.  I suggested that we have a color run.  My personal kids had been begging me to sign them up for one.  After researching a dry color formula and a wet color formula on Pinterest, I submitted them to our PTA for the final decision.  The PTA voted on the wet color formula because they thought the color could be controlled more and wouldn't get in the student's eyes.

We chose to use our school colors for the run.  The ingredients were simply:  water, food color and vinegar.  The color was completely washable.  We had no complaints about skin irritants or such.

For 900+ students we bought:
10 boxes of 1 oz food color
1 large jug of vinegar 
10 spray bottles

The cost was under $50.  If you have parents donate the items, it could be free for you!

We put 100 drops of food color in each bottle.  This was approximately half of each food color bottle.  We put a couple of ounces of vinegar in each bottle to bring the color out on the shirts.  No need to measure.  Then we filled the bottles with water.


Permission slips were sent home to allow students to be sprayed.  We tied a ribbon around each child's wrist who had permission.  This way the sprayers knew exactly who was allowed to be sprayed.  The volunteers who were spraying were stationed around the running area.  We explained to the students that they wouldn't be sprayed by each person and they weren't to stop in front of the sprayers.   We didn't want the kids soaking wet.  We also wanted to preserve the spray so that we could keep our budget down.  Each group was given 30 minutes of running time.  We split the school into 3 groups.

Each child was given the task of raising donations for the run.  Most children brought in about $5 a piece.  Of course we had our top fundraisers who brought in more.  The grand total for fundraising was over $6,000.  The best part was that it was easy to set up and when the run was over, we were done.  There were no products to be organized and dispersed.

The parents that spoke to me had a lot of positive feedback.  They loved that they didn't have to buy anything.  They were thrilled that the students were having a great time, building memories and exercising!  If you have any questions about how we ran this, stop on by my blog and email me.


Martin Luther King Jr.


My lessons and materials are ready for next week and I thought that I would share them with you in the hopes that it makes your life a little bit easier.

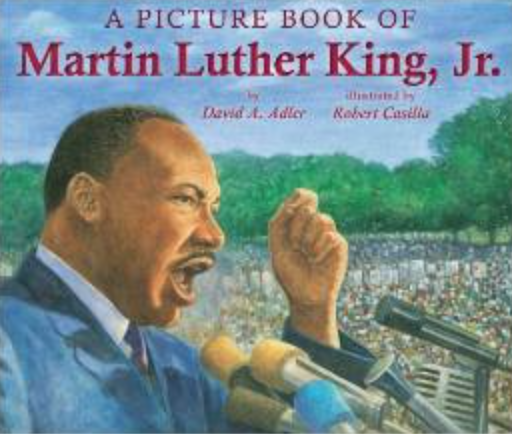
If you didn't get a chance to stop by the library before you left school you can still order them through Amazon.  I don't know what I would do without Prime.  You can link to MLK books by clicking on the pictures below.

 Martin Luther King, Jr. Picture Book
Martin Luther King Jr. Books
 Martin's Big Words

 Who Was Martin Luther King Jr.?

We plan on doing a little close reading about Dr. King with this pack by A First For Everything.
 MLK Jr. Close Read
There are some comprehension sheets included in this pack that we will use for bellwork.

For engagement on the second day, I plan on giving the kids the following bookmarks by PAWSitively Teaching.  The students will have to write: what they think the quote means in their own words, what it would look like and what it would sound like.


Throughout the week we will be working on standards based crafts that I created.  We will be using writing paper and anchor charts from my pack too.


I hope that these ideas help to make your week a little bit easier on you.  Have a great long weekend.
xoxo

Fairy Tales and Folktales with Mrs. Labrasciano


Fairy Tales With Mrs. Labrasciano
Hi everyone! It's Amy writing here from Learning Lessons With Mrs. Labrasciano.  Today I want to talk to you all about the fairy tale and folktale unit that I teach my students.  Everyone loves a good fairy tale unit and I have some ideas to make it easy on you and engaging for the students.

Retelling Crowns With Mrs. Labrasciano

Retelling folktales and fairy tales is part of most 2nd and 3rd grade standards.  We like to make it fun by putting together retelling crowns.  Students can retell the story around a sentence strip.  In the picture above you'll see a crown added.  I like to have the students state the moral from the story on the back of the crown.  It's fun way to master a standard without the monotony of the everyday paper and pencil test.

Rapunzel With Mrs. Labrasciano
For the story Rapunzel, the students made a fun tower with her braid coming down.  The braid was made from yellow ribbon.  The students wrote Rapunzel's point of view on the back of her tower.  

The Three Little Pigs With Mrs. Labrasciano
Look at this cute pig! The students made him out circles and triangles.  This story is perfect for describing how characters respond to major events.  The class was split up into fourths and each group wrote how their character responded to the events in the story.  We hung their stories up with the pigs for a cute display.

The Ugly Duckling With Mrs. Labrasciano
The Ugly Duckling has a great lesson.  For this story the kids responded to the text by describing the lesson and how they could use it in their lives.  To add a little fun they can make their own ugly duckling cover. 

Snow White With Mrs. Labrasciano
One of my personal all time favorites is Snow White.  We also made retelling crowns for Snow White with red apples.  We loved the apple theme so much that we wrote the plot of the story on a scroll and turned it into an apple! This was a real hit with the kids.

Jack and the Beanstalk With Mrs. Labrasciano
Who doesn't love a beanstalk? For Jack and the Beanstalk, you can make a beanstalk by braiding three pieces of green tissue paper together.  Have the students write the character traits of Jack and the Giant on leaves and glue them to the stock.  

Fairy Tales With Mrs. Labrasciano
If you don't have time to make all of the templates and lesson plans you can purchase everything you see here in my store.  The unit has over 200 pages and addresses over 13 fairy tales and folktales.  All of these lesson plans and materials are copyrighted to Amy Labrasciano 2014.  

Reusable Anchor Chart for Fairy Tales


Fairy Tales With Mrs. Labrasciano


Wreath Making with Mrs. Labrasciano


Wreath Making With Mrs. Labrasciano

Hi everyone! It's Amy from Learning Lessons With Mrs. Labrasciano. I was recently invited to a friend's house for a wreath making lesson.  My friend Courtney is very talented.  Every room in her house looks like it is from a magazine.  If you don't believe me, check out her front door at the bottom of this post.  When Courtney told me we could make wreaths for around $10 I was a tiny bit skeptical.  Boy was I wrong!  Wreath making works perfect for the teacher's budget.  You can make them for gifts, yourself or your  classroom.
Deco Ribbon and Burlap Ribbon

You can find everything you need for a basic wreath in the floral department of Walmart.  Extra fancy materials will need to come from a craft store.  Make sure to bring your coupons.  The fancier wreaths will be closer to $15.

Materials Needed:
Deco Ribbon ($3) and/or Burlap ($3) (a total of 2 spools for a 24" wreath)
24" wreath frame ($2.50)
pipe cleaners(take from your classroom)
Misc. Decorations ($1)

Wire 24" Wreath

 The first thing that you need to know is that there is no right or wrong when making wreaths.  You can take the wreath apart and start over if you don't like it so take risks and don't be nervous.
 Cut small pieces of pipe cleaners to attach the ribbon and burlap with.  Start by attaching your ribbon or burlap.
 Bunch your burlap/ribbon and attach to another wire.  I go back and forth for my wreaths.  Some people like to stay on the same wire to create a more uniform look.  Look through this post to decide which one you like.
 For the wreath pictured at the top of this post I used the entire spool of burlap and went around twice.
 Try to fluff the burlap or ribbon so that it covers as much of the pipe cleaners as possible.
 Now you are ready for your second color.  I only used a small portion of the deco ribbon.  That leaves almost a whole spool for another wreath.
 Don't mind me in my pjs. We craft whenever time allows.
 Try to attach the deco ribbon inside of the burlap to cover the pipe cleaners. 
 Once you are done, fluff the ribbon to your liking.

 The final pipe cleaners can be covered by decorations.  If you don't want to use decorations you can cover the pipe cleaners with tulle or another fabric.   Hot glue the decorations on.

The following wreaths came from the wreath making party that I was at.  You will see a combination of ribbon, tulle and other materials used in wreaths.
 The wreath below was created by attaching the deco ribbon to the same wire throughout.


 The wreath below only cost about $8 to make.  You can get deco tulle from Walmart for about $1.50.  The ribbon is hot glued in.

The wreaths with the fuller look are made with large sheets of deco ribbon.  This deco ribbon makes two  wreaths.

A huge thank you goes to Courtney for inviting me into her beautiful home and introducing me to wreath making.