16 January 2015

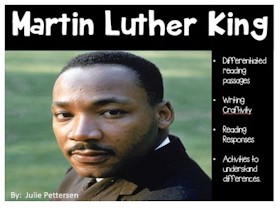
Martin Luther King Jr.


My lessons and materials are ready for next week and I thought that I would share them with you in the hopes that it makes your life a little bit easier.

If you didn't get a chance to stop by the library before you left school you can still order them through Amazon.  I don't know what I would do without Prime.  You can link to MLK books by clicking on the pictures below.

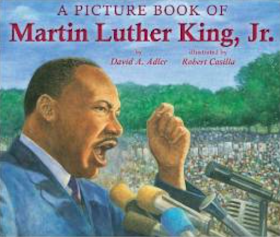
 Martin Luther King, Jr. Picture Book
Martin Luther King Jr. Books
 Martin's Big Words

 Who Was Martin Luther King Jr.?

We plan on doing a little close reading about Dr. King with this pack by A First For Everything.
 MLK Jr. Close Read
There are some comprehension sheets included in this pack that we will use for bellwork.

For engagement on the second day, I plan on giving the kids the following bookmarks by PAWSitively Teaching.  The students will have to write: what they think the quote means in their own words, what it would look like and what it would sound like.


Throughout the week we will be working on standards based crafts that I created.  We will be using writing paper and anchor charts from my pack too.


I hope that these ideas help to make your week a little bit easier on you.  Have a great long weekend.
xoxo

13 January 2015

Fairy Tales and Folktales with Mrs. Labrasciano


Fairy Tales With Mrs. Labrasciano
Hi everyone! It's Amy writing here from Learning Lessons With Mrs. Labrasciano.  Today I want to talk to you all about the fairy tale and folktale unit that I teach my students.  Everyone loves a good fairy tale unit and I have some ideas to make it easy on you and engaging for the students.

Retelling Crowns With Mrs. Labrasciano

Retelling folktales and fairy tales is part of most 2nd and 3rd grade standards.  We like to make it fun by putting together retelling crowns.  Students can retell the story around a sentence strip.  In the picture above you'll see a crown added.  I like to have the students state the moral from the story on the back of the crown.  It's fun way to master a standard without the monotony of the everyday paper and pencil test.

Rapunzel With Mrs. Labrasciano
For the story Rapunzel, the students made a fun tower with her braid coming down.  The braid was made from yellow ribbon.  The students wrote Rapunzel's point of view on the back of her tower.  

The Three Little Pigs With Mrs. Labrasciano
Look at this cute pig! The students made him out circles and triangles.  This story is perfect for describing how characters respond to major events.  The class was split up into fourths and each group wrote how their character responded to the events in the story.  We hung their stories up with the pigs for a cute display.

The Ugly Duckling With Mrs. Labrasciano
The Ugly Duckling has a great lesson.  For this story the kids responded to the text by describing the lesson and how they could use it in their lives.  To add a little fun they can make their own ugly duckling cover. 

Snow White With Mrs. Labrasciano
One of my personal all time favorites is Snow White.  We also made retelling crowns for Snow White with red apples.  We loved the apple theme so much that we wrote the plot of the story on a scroll and turned it into an apple! This was a real hit with the kids.

Jack and the Beanstalk With Mrs. Labrasciano
Who doesn't love a beanstalk? For Jack and the Beanstalk, you can make a beanstalk by braiding three pieces of green tissue paper together.  Have the students write the character traits of Jack and the Giant on leaves and glue them to the stock.  

Fairy Tales With Mrs. Labrasciano
If you don't have time to make all of the templates and lesson plans you can purchase everything you see here in my store.  The unit has over 200 pages and addresses over 13 fairy tales and folktales.  All of these lesson plans and materials are copyrighted to Amy Labrasciano 2014.  

Reusable Anchor Chart for Fairy Tales


Fairy Tales With Mrs. Labrasciano


Wreath Making with Mrs. Labrasciano


Wreath Making With Mrs. Labrasciano

Hi everyone! It's Amy from Learning Lessons With Mrs. Labrasciano. I was recently invited to a friend's house for a wreath making lesson.  My friend Courtney is very talented.  Every room in her house looks like it is from a magazine.  If you don't believe me, check out her front door at the bottom of this post.  When Courtney told me we could make wreaths for around $10 I was a tiny bit skeptical.  Boy was I wrong!  Wreath making works perfect for the teacher's budget.  You can make them for gifts, yourself or your  classroom.
Deco Ribbon and Burlap Ribbon

You can find everything you need for a basic wreath in the floral department of Walmart.  Extra fancy materials will need to come from a craft store.  Make sure to bring your coupons.  The fancier wreaths will be closer to $15.

Materials Needed:
Deco Ribbon ($3) and/or Burlap ($3) (a total of 2 spools for a 24" wreath)
24" wreath frame ($2.50)
pipe cleaners(take from your classroom)
Misc. Decorations ($1)

Wire 24" Wreath

 The first thing that you need to know is that there is no right or wrong when making wreaths.  You can take the wreath apart and start over if you don't like it so take risks and don't be nervous.
 Cut small pieces of pipe cleaners to attach the ribbon and burlap with.  Start by attaching your ribbon or burlap.
 Bunch your burlap/ribbon and attach to another wire.  I go back and forth for my wreaths.  Some people like to stay on the same wire to create a more uniform look.  Look through this post to decide which one you like.
 For the wreath pictured at the top of this post I used the entire spool of burlap and went around twice.
 Try to fluff the burlap or ribbon so that it covers as much of the pipe cleaners as possible.
 Now you are ready for your second color.  I only used a small portion of the deco ribbon.  That leaves almost a whole spool for another wreath.
 Don't mind me in my pjs. We craft whenever time allows.
 Try to attach the deco ribbon inside of the burlap to cover the pipe cleaners. 
 Once you are done, fluff the ribbon to your liking.

 The final pipe cleaners can be covered by decorations.  If you don't want to use decorations you can cover the pipe cleaners with tulle or another fabric.   Hot glue the decorations on.

The following wreaths came from the wreath making party that I was at.  You will see a combination of ribbon, tulle and other materials used in wreaths.
 The wreath below was created by attaching the deco ribbon to the same wire throughout.


 The wreath below only cost about $8 to make.  You can get deco tulle from Walmart for about $1.50.  The ribbon is hot glued in.

The wreaths with the fuller look are made with large sheets of deco ribbon.  This deco ribbon makes two  wreaths.

A huge thank you goes to Courtney for inviting me into her beautiful home and introducing me to wreath making.